
Adelaide-Crafers Highway
| Adelaide-Crafers Highway | |
|---|---|

|
|
| Basic data | |
| Operator: | DPTI |
| Start of the street: |
|
| End of street: |
Crafers ( Adelaide ) ( SA ) ( 35 ° 0 ′ S , 138 ° 42 ′ E ) |
| Overall length: | 10 km |
|
States : |
|
 |
|
The Adelaide-Crafers Highway is a highway in the center of the Australian state of South Australia . It connects Adelaide city center with the South Eastern Freeway . In the course of this city motorway is the 500 m long Heysen tunnel with two tubes, the first of its kind on an Australian trunk road. The Adelaide-Crafers Highway runs along its entire length with the Princes Highway .
history
The Adelaide-Crafers Highway is a much-needed extension of Mount Barker Road , which used to wind its way up through the Adelaide Hills with many curves . The tightest hairpin bend on Mount Barker Road became known as Devils Elbow , as accidents involving cars or semi-trailers often occurred there.
On May 16, 1995, then Prime Minister Paul Keating announced the construction of a new motorway. The Heysen Tunnel, named after the well-known South Australian artist and patron Hans Heysen , was completed in 1998. The highway construction was completed in early 2000 and on May 5, 2000 Prime Minister John Howard opened the new road. It was the largest road project in South Australia at the time and cost AU $ 151 million, all of which came from the Australian federal government.
Furnishing
The Adelaide-Crafers Highway has 6 lanes, emergency lanes, and concrete central crash barriers. It is illuminated for the entire 10 km.
safety
Shortly after the Adelaide-Crafers Highway opened, a number of trailer truck accidents drew media attention to the new road. In particular, a near-fatal accident involving a semi-trailer truck in May 2007 was widely reported in the media. The old Mount Barker Road was a known dangerous route, but the new road presented a new difficulty with its continuous incline. Trucks with poor brakes had difficulty braking above a certain speed. It took a long time and it was necessary to put up several warning signs in front of the slope until the truck drivers got used to the new situation. Semi-trailer trucks sometimes only drive down the freeway at a speed of 20-30 km / h. In 2005, demand traffic signs were erected every 200 meters, which Transport SA in Adelaide can switch to the necessary speed limits. This improved the safety of road construction workers and emergency services.
In 2011, after several truck accidents - one drove into a bus stop and another shot straight ahead over the intersection at the end of the slope - new regulations were introduced, vehicles with more than 4 axles must remain in the left lane and maintain a maximum speed of 60 km / h between the intersection in Crafers and the old customs house . Traffic cameras were installed to monitor the new regulations.
There are also new road signs for the two emergency downhill lanes to alert truck drivers who have lost control of their vehicle to these lanes.
Exits and crossings
|
Adelaide-Crafers Highway Princes Highway |
|||
| Exits or crossings to the east
|
Distance from South Eastern Freeway (km) |
Distance from Glen Osmond Road (km) |
Exits or crossings to the west
|
|
Beginning of the Adelaide-Crafers Highway from Glen Osmond Road |
10 | 0 |
End of Adelaide-Crafers Highway further than Glen Osmond Road to Adelaide city center |
| Glen Osmond Portrush Road Cross Road |
Glen Osmond Portrush Road Cross Road |
||
| Mount Osmond Mount Osmond Road |
8th | 2 | Mount Osmond Mount Osmond Road |
| Eagle On The Hill Devil's Elbow Mount Barker Road |
6th | - | no exit |
|
HEYSEN-TUNNEL slope |
- | - |
HEYSEN-TUNNEL slope |
| no exit | 0 | 10 | Eagle on the Hill Mount Barker Road |
|
End of Adelaide-Crafers Highway and continue as South Eastern Freeway to Murray Bridge / Melbourne |
Beginning of the Adelaide-Crafers Highway from the South Eastern Freeway |
||
Gallery images

Portal of the Heysen tunnel
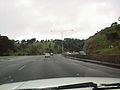
Adelaide-Crafers Highway. On the way to Murray Bridge

Adelaide-Crafers Highway on a foggy day.

Adelaide-Crafers Highway in Crafers.
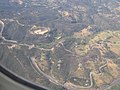
Eagle on the Hill is directly above the tunnel entrance. The old road winds up in curves from Devils Elbow.


Web links
source
- Steve Parish: Australian Touring Atlas . Steve Parish Publishing. Archerfield QLD 2007, ISBN 978-1-74193-232-4 , p. 64.
Individual evidence
- ↑ Old and New Road Names . City of Burnside. March 8, 2006. Archived from the original on August 29, 2007. Retrieved July 14, 2007.
- ^ The Adelaide Crafers Highway Project ( August 29, 2007 memento in the Internet Archive )