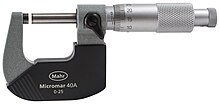
micrometer
A micrometer (often micrometer or only microns called) is a length measuring device .
Structure and operation
In most cases, a micrometer consists of a fixed and a movable measuring surface, adjustable with a fine thread , which are usually connected to one another by a bracket (outside micrometer). The test piece to be measured is placed between these two parallel measuring surfaces and the thread is turned by means of an adjusting screw (usually knurled ) until both measuring surfaces touch the test piece. Occurring test forces: see below. The Abbe comparator principle is adhered to. The roundness of a test object, on the other hand, cannot be measured with a micrometer. The ideal measuring force is between 5 N and 10 N (Newtons). To get the best possible measurement results, the micrometer should be held on the insulating plate (black casing). If you were to hold the micrometer on the silver surfaces, the heat given off by the hand would expand them and falsify the measurement result. The reference temperature at which the most accurate measurements are possible is 20 ° C.
On a scale parallel to the direction of displacement, the size of the test object can be read off in whole pitches of the screw, usually whole or half a millimeter; a second scale along the circumference is used to read the proportion that only makes up a fraction of the pitch ( thread pitch ). You can usually read the 0.01 mm on this fine scale. If a vernier is available, 0.001 mm can also be read. In order to avoid falsification of the measured value due to different measuring forces (deformation of the test item and the micrometer), the thread is turned using a slip clutch , also known colloquially as a ratchet or feeler screw or ratchet . In this way, the test forces that occur should be kept constant and reproducible. Practically all micrometers have handles or shells made of plastic to isolate and prevent the expansion of the screw and bracket resulting from the heat of the hand. There are high-quality devices with an additional digital display of the measured values.
Micrometers are also integrated in other instruments such as theodolites , universal instruments and levels . They are also used to tilt glass plates in a defined manner in various optical devices and thus achieve a parallel offset of the beam path.
Different micrometers are required to measure inside, outside and depth dimensions and to measure gear flanks.
history
Henry Maudslay developed the measuring device in 1829, because the measuring results of the devices used up to then depended very much on their handling. This device, similar to today's vice, had a brass base and two jaws made of hardened steel, one of which could be moved using a fine screw. Today, these measuring surfaces are each equipped with a hard metal plate so that they are wear-resistant. Along the guide surface of the jaws was a scale divided into tenths of an inch , while the crank indicates hundredths and thousandths of a millimeter or inch.
Types and uses of micrometers
Outside micrometers for outside measurements
In most cases, outside micrometers are used to measure round outside diameters on shafts, bolts and tubes. The micrometer and the bracket form a solid unit. Common sizes in trade and industry are between 0 and 500 mm; however, there are - depending on requirements - larger measuring ranges that must be covered. Outside micrometers are also used, which have interchangeable micrometers of different sizes (measuring range). To measure gear teeth , outside micrometers are used, which instead of the simple measuring surfaces have plates with a larger diameter than the screw shaft. In everyday business use these are called "plate" or "flank micrometers". Micrometers with flat, level measuring surfaces are used to measure radial grooves. There are also inserts with tapered tips. External thread on screws, threaded bolts, etc. Ä. are measured with outside micrometers that use inserts that match the pitch and type of thread to be measured.
Inside micrometers for inside measurements
Inside micrometers come as two- or three-point inside micrometers. They are used to measure bore diameters. Roundness cannot be measured with inside micrometers either. The measuring surfaces are available as point, line or the special shape Schnabel measuring surfaces.
Special forms
Micrometers with measuring anvils are used to measure three, five or more edges. Special shapes are made by manufacturers upon customer request.
Testing of micrometers
The on-site self-test is carried out using setting standards or gauge blocks or measuring rings. Depending on the organization and requirements, micrometers can be tested internally by quality assurance or externally by the manufacturer or certified calibration centers.
equipment
In addition to cleaning products , micrometer accessories include setting standards , measuring rings, flat glasses , gauge blocks , load cells (to test the measuring force), screws, keys, levers, sample, comparison or standard parts, stands, holders, extensions, digital devices with interfaces for evaluating or logging measurement results.
See also
Web links
- Micrometer operation and maintenance. Retrieved on December 23, 2016 (description with picture examples to read).
- Can you read correctly from an outside micrometer? November 16, 2016, accessed on December 23, 2016 (description with sample images for reading).
swell
- ↑ Günter Spur: On the change in the industrial world through machine tools, a cultural-historical consideration of manufacturing technology . Carl Hanser Verlag, Munich Vienna 1991, ISBN 3-446-16242-9 , pp. 154 .


