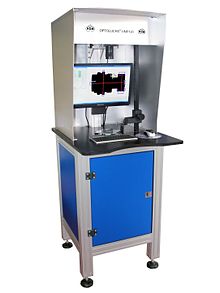
Measuring microscope
A measuring microscope is an extension of conventional light microscopes to include a target device (e.g. a scale or crosshair in the eyepiece) and a positioning device with a position measuring system ( e.g. an xy table ). It was developed in 1768 by the astronomer and physicist Michel Ferdinand d'Albert d'Ailly and is now also used as a measuring device for determining and checking geometric dimensions through video projection or image capture on technical products. It is suitable for measuring lengths , radii , diameters and angles . Also, threaded , hole spacing and hole dimensions can be measured.
Measuring principle
The measurement of distances in a plane perpendicular to the optical axis takes place
- By aiming at a point on the surface of flat measuring objects,
- by subsequently moving the measuring object until a second measuring point is under the crosshairs, and
- Reading of the displacement distance on the positioning system .
Modern execution
Manual measuring microscopes still find numerous uses. In the meantime, however, automation into so-called image processing measurement systems (also called video measurement projectors ) is possible. In principle, the operator's eye is replaced by an opto-electronic image converter (e.g. CCD or CMOS) and the manual targeting of the measuring points is replaced by automatic edge detection. A video measuring projector basically consists of an industrial image processing system with a camera , optical components , monitor , image evaluation software, lighting and a tripod mechanism. Automated reading of the coordinates of the positioning system and subsequent data fusion in the measuring computer mean that measuring processes that run automatically can now be programmed.
A video measurement projector is suitable for performing measurement tasks from production control or incoming goods inspection.
To measure lengths, radii, diameters and angles, a digital measuring camera with an image sensor of a few megapixels with transmitted or reflected light illumination captures an image of the product to be measured and displays it on a screen. A high-quality measuring lens with a fixed focal length and invariant imaging behavior depicts the shadow profile of the product on the camera's sensor. The operator sets the measuring ranges manually with a cursor . In these areas, the software then searches for the exact position of the measuring edges and the dimension is calculated according to a preselected measuring rule. Measurement regulations are z. B. length, radius, diameter or angle measurement.
Depending on the selected measuring rule, the processor calculates the actual dimension and compares it with the nominal dimension, taking into account tolerance inputs .
The measurement accuracy of such systems depends on the size of the objects to be measured and the resolution of the camera used.
The disadvantage of the method is that only the dimensions that can be seen in the silhouette can be removed in one setting.
