Aitape Wewak campaign
| date | November 1944 to August 1945 |
|---|---|
| place | Geblet around Aitape and Wewak , Territory of New Guinea |
| output | Surrender of the Japanese |
| Parties to the conflict | |
|---|---|
| Commander | |
|
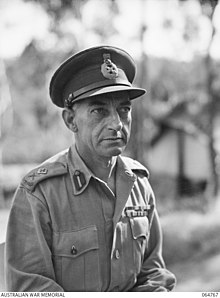
Thomas Blamey , |
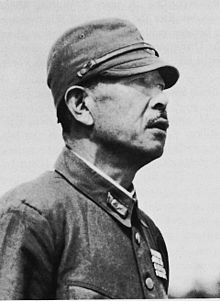
Adachi Hatazō , |
| Troop strength | |
| approx. 13,000 | approx. 30,000 to 35,000 |
| losses | |
|
about 500 |
approx. 9,000 |
1942
Rabaul -
1. Salamaua-Lae -
Operation MO -
Coral Sea -
1. Buna-Gona -
Kokoda Track -
Milne Bay -
Goodenough -
2. Buna-Gona -
Operation Lilliput
1943
Wau -
Bismarck Sea -
I -
2. Salamaua – Lae -
Finisterre -
Cartwheel -
Bougainville -
Huon -
Dexterity / Arawe -
Bombing of Rabaul
1944 - 1945
Admiralty Islands -
Emirau -
Take Ichi convoy -
Reckless -
Persecution -
Wakde-Sarmi -
Biak -
Noemfoor -
Driniumor -
Sansapor -
Morotai -
Aitape – Wewak
The Aitape Wewak Campaign was one of the last major operations during the Pacific War in World War II . The Australian 6th Division , supported by naval and air forces , fought the 18th Army of the Japanese Empire in the territory of New Guinea from November 1944. These fighting, which lasted until the end of the war, were viewed by the Australians as a "clean-up operation".
Given the prevailing climatic and territorial conditions there, the losses due to diseases and the fighting were very high in relation to the strategic necessity. This was precisely what was later called into question.
The Japanese armed forces were able to be driven inland from the coastal areas.
prehistory
During the Pacific War, the city of Aitape and the rest of the northern territory of New Guinea were initially occupied by the Imperial Japanese Army in March 1942 as part of the invasion of Southeast Asia . The Japanese also laid the Tadji airfield there .
Recaptured by an American landing on April 22, 1944 (→ Operation Persecution ), Aitape became an Allied staging area to support the further advance towards the Philippines . In order to free American troops for Philippine operations, the defense of the area was turned over to Australian forces on the orders of General Blamey . The troops of the 6th Australian Division and the 3rd Base Sub Area , a logistics unit , began to gradually relieve the Americans from the beginning of October 1944.
The battle area
The fighting took place in an elongated triangle in the northeast of the country. It was bounded to the north by the sea, to the south by the Sepik river and to the west by approximately a north-south line through Aitape. Around Aitape the swampy coastal plain stretches about 13 km inland before it reaches the foothills of the Torricelli Mountains . To the east of Aitape, the plain narrows and the mountains almost reach the beach. North of the Torricelli Mountains there are some river deltas that are exposed to sudden flooding during the rainy season. In the south, the streams flow into the Sepik, a large river that ships can travel around 480 km inland. Between the streams flowing to the south there is a series of steep, heavily forested ridges and rock spurs which, however, become a little less rough at Maprik and there are large areas with silver hair grass .
Only on foot could the units move in the mountains, which rise abruptly on the southern flank. Often the peaks of the rocky ridges leading into these areas were only very narrow and offered a variety of locations for defense positions that were extremely difficult for infantry to attack or for artillery to reach.
There were several kilometers of motorable road near Aitape and Wewak and a road between Marui and Maprik, which before the war had been an administrative center and the site of an airfield. The coastal region was sparsely populated, but the fertile hill country south of the Torricelli Mountains was fairly densely populated and its many villages were connected by a network of footpaths.
The Japanese situation
The 18th Army suffered great losses as a result of Australian operations in the hinterland of Salamaua , on the Huon Peninsula (→ Battle of the Huon Peninsula ) and in the contested Finisterre Mountains . In addition, there was the severe setback that the 18th Army suffered after the attack on the American garrison to protect the airfield and port of Aitape.
The Australian Secret Service believed by October 1944 that the 18th Army had shrunk to about 30,000 men. However, the correct number was around 35,000. It was also known that Lieutenant General Adachi Hatazō's army headquarters was located a few kilometers west of Wewak. Around 2,000 men were suspected to be on the islands of Kairiru and Muschu . The 51st division under Lieutenant General Nakano Hidemitsu was to be located in the coastal region from the Sepik River to around Karawop , the 20th Division under Lieutenant General Nakai Masutaro at the But and Dagua airfields and in the interior of the Maprik area, and the 41st Division under Lieutenant General Mano Gorō from the Anumb River to the coast to Balif , where they had their headquarters.
Many Japanese were sick or physically weak from a lack of food and medicine. Much of the work was done in gardening and fishing, and 3,000 grassroots troops were distributed to forage in the countryside.
The Australian situation
On September 15, 1944, a reconnaissance unit from the 3rd Base Sub-Area under Lieutenant Colonel JT Lang landed in Aitape. It was intended to build a base camp for the advancing 6th Division. In mid-October, more transports with supplies and men from the unit arrived. When the first soldiers of the 6th Division arrived the base was set up, but the lack of ships and unloading facilities hindered the further process considerably. Ultimately, it took three and a half months for the last combat units to arrive in Aitape. The 6th Division was under the command of Major General Jack Stevens .
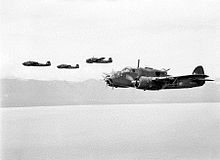
For air support, the No. The 71st Wing of the RAAF provided three Beaufort squadrons . The tactical reconnaissance should be carried out by the 4th season with boomerangs and wirraways . Further assistance should also be provided by aircraft from the American Combat Replacement and Training Center in Nadzab , northwest of Lae .
After preliminary patrols to explore the situation, the Australian advance of the 6th Division brigades began in December 1944. It had two axes; the first along the coast towards the Japanese base at Wewak and the other into the Torricelli Mountains, which targeted the Maprik area. The Japanese used this area for foraging and planting so that the Japanese armed forces could survive.
Beginning of the fighting
The Japanese 20th and 41st Divisions had reinforced their patrols and prepared defensive positions. As a result, the Australians made slow progress against tough opponents on both fronts, but they benefited from their superior training and equipment. At the end of January 1945, the 19th Brigade reached the Danmap River . They lost 36 men, some of whom drowned in floods. The Japanese lost 434 soldiers in the fighting. Both sides suffered from tropical diseases , especially malaria , which raged during the rainy season .
Then the 19th Brigade was replaced by the 16th.
For the beginning of 1945 General Stevens made three proposals for further action. He preferred to advance along the Torricelli Mountains to prevent the Japanese from retreating south from Wewak to the more fertile areas where they had planted gardens. But the resources were not available for this. The necessary additional air support could not be provided. Instead, on February 10, he was ordered to advance further along the coast towards Wewak, within the limits of his own resources and without major battles.
Fight for the But and Dagua airfields
A battalion of the 16th patrolled the coast to the northwest slope of Nambut Hill where it encountered Japanese resistance. On the night of January 29th to 30th, a heavy enemy attack was repulsed on the northwest slope of the hill. After a blow to Japanese positions on the hill failed on February 4, air support was requested. The following day, eight Beauforts bombed the hill after the infantrymen marked the target with smoke bombs. Boomerangs and Beauforts continued to bombard the hill over the next few days, allowing the infantry to capture two enemy positions on the northwestern slopes. The infantry successfully carried out a surprise attack on the highest point of the hill on February 16. After further air raids, two more enemy positions were captured and by February 19, the Nambut was completely captured by the Australian units.
Against little resistance, the battalion occupied positions on the But airfield on March 16, and the But area was completely liberated on March 19.
The advance to the nearest airfield, Dagua, began on March 20. On a ridge on the side of the road, the Australians found some rifles and equipment that indicated that 60 to 70 Japanese had camped there the previous night. Apparently the rapid advance on But had taken them by surprise and they had fled their position.
On the overgrown Dagua airfield, as in But, there were a few abandoned planes, many rusty engines and dumps of rusty bombs. There was almost no Japanese resistance.
The Japanese have now been driven out of important areas. In the mountains, the headquarters of the 41st Division in Balif had to be abandoned. The Japanese had been pushed south from the coast and now had to be fought on the foothills of the mountains. This sparked the toughest fighting since the start of the Australian offensive and it took most of April to secure the area. These fierce fighting began to degrade the 6th Division's morale, especially as it all seemed rather pointless since the focus of the Pacific War was so much closer to Japan at the time. Perhaps in response, the division finally received more naval support, including transport and warships.
Fight for Maprik
The next Australian destination was Maprik, east of Balif in the mountains. As early as mid-March, the Australian Beauforts began attacking Japanese defensive positions west and north of Maprik. The Japanese responded with light anti-aircraft fire.
The area around Maprik was reached by the infantry units in mid-April, but the Japanese again offered heavy resistance and it took several days to evacuate the area. The Australians advanced on the inland route throughout May, steadily pushing the Japanese back.
The Japanese were well prepared to defend Maprik. Every approach of the Australians was closely watched by them. An Australian patrol advanced with a view to Maprik was eliminated on April 12. Two days later the Australians tried to drive the Japanese out of a good position with mortar fire , but this failed. On April 15, two companies moved east to the Screw River . The Japanese were attacked from the air as well as with mortars and machine guns, but defended themselves strongly from well-dug positions. In the surrounding villages there were repeated fights with smaller groups over the next few days. The Japanese managed to hold entrenched positions around Maprik for days.
On April 21, the Australian infantry troops launched a major attack on the city, which was captured the next day. The Japanese had abandoned the west side of the Screw River and began to withdraw to the north. The largest air raid in terms of numbers was also carried out on April 22nd, when 33 bombers bombed a Japanese headquarters about 6.5 km east of Maprik in three waves.
On April 28th, another Australian headquarters was built above Maprik. The following day it became known that an airfield in the Torricelli Mountains was available for the supplies. The advancing soldiers and local porters on their five-day march to Maprik could be supplied with airdrop using a Dakota .
At the end of April, the Australians continued their advance in the coastal area. Surprisingly, the Japanese resistance continued to weaken, even though strong resistance was expected.
The condition of the Japanese soldiers became increasingly miserable. The extremely poor diet and disease affected their strength and the hopelessness of their position lowered morale. There have been cases of insubordination , murder and theft , especially of food. Some even surrendered to the Australians.
This was made particularly clear by the so-called Takenaga incident that took place on May 3 . A battalion commanded by Lieutenant Colonel Takenaga Masaharu with a total of 42 soldiers surrendered to the Australian Army near Maprik. This was extremely unusual for the Japanese army, where surrender was viewed as highly dishonorable.
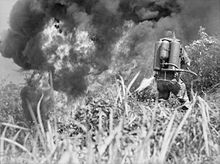
The fighting in the wider area around Maprik continued for the next days in May. Australian patrols repeatedly encountered isolated Japanese units, which were fought with flamethrowers , light artillery or the machine guns carried.
Advance on the coast
As a preliminary step, General Stevens had decided to move the 19th Brigade and other troops to the base in But. To make room for them, the main body of the 16th Brigade was concentrated east of the River But. Patrols found no Japanese along the coast as far as Kofi in early April . The place Karawop was taken on 21 April. The mouth of the Hawain was also occupied without further resistance . After crossing the river on April 25, only a small group of Japanese fired from the foothills of the mountains at the Australian soldiers. The Japanese then quickly withdrew.
The Japanese opposition in the Koanumbo area turned out to be stronger. On April 29th, the Australians encountered a group of fifteen who had dug in. The next day, two platoons launched an attack on the Japanese, who then withdrew. During the following further advance there was heavy fighting with a Japanese unit consisting of around 50 men. These could be fought with artillery and air strikes.
Generals Blamey, Sturdee , Stevens and Berryman had met in Lae on April 20 and discussed how to proceed against Wewak. Sturdee and Stevens felt that with the resources available, Wewak could be taken. Blamey approved orders drafted by Stevens on April 27th. Accordingly, an advance of the 19th Brigade from Hawaii to Cape Worn was planned by May 14th. Wewak would then be attacked by the 19th Brigade. A command regiment and other departments formed the so-called Farida Force and were supposed to land at the eastern end of Dove Bay at Cape Moem and be supported by a sea bombardment. In order to cut off the escape route to the north for the Japanese, the road between Wewak and Forok had to be secured. Blamey also gave instructions that a battalion of the 8th Brigade, which was then stationed in Madang , should be ready to support the command regiment if necessary. The 17th Brigade was to continue patrol operations around Maprik.
Landing in Dove Bay
A small flotilla was available to support the 6th Division. The so-called Wewak Force consisted of the Sloop Swan , the corvettes Dubbo and Colac and five large motorboats . The corvettes searched for mines off the west coasts of Kairiru and Muschu and later off the east coasts and around the entrance to the port of Wewak . The motorboats probed in dubious canals off Wewak and patrolled the coast westward to Mushu Strait and along the banks of Muschu and Kairiru. Swan , supported by the corvettes, bombed selected targets. In the period up to May 3, Swan and the corvettes fired 1,440 rounds at targets on land.
Although General Stevens had asked for further assistance from See early on, it was late. They were the cruisers Hobart and Newfoundland and the destroyers Arunta and Warramunga , all under the command of Commodore Farncomb .
An extended RAAF squadron consisting of 60 Beauforts and Boomerangs was available for air support on D-Day , which was scheduled for May 11th . It should support the amphibious operation in Dove Bay and the simultaneous advance of the troops along the coast to Wewak.
The troops of the Farida Force were brought from But with the two corvettes to about 8 km from Dove Bay, where they transferred to the landing craft. Before landing, the cruisers Hobart and Newfoundland , as well as the destroyers Arunta and Warramunga and the Swan , bombarded the bay's coastline. When the bombardment ended at 8:30 a.m., the Farida Force went ashore and quickly secured a beachhead against little Japanese resistance.
Taking Wewak
In Wewak itself, the Australians met only a few Japanese, so that the entire area around Wewak was in their hands on May 13th. Cape Boram was occupied on May 18, and a week later the units took control of Cape Moem. On May 23, the crossroads of the armed forces of Wewak and Dove Bay united on the coast of Brandi Plantation.
The Japanese position now extended from near Yamil in the west to the mountains south of Wewak in the east. They had built strong defenses in these areas and were fighting to defend their food-producing gardens. The Australians had better artillery support, but suffered from a relative lack of bombs for their air support.
The advance into the Japanese-occupied territories began in early June 1945. The Australians were able to displace the Japanese from the Yamil positions in the west under heavy fighting. Troops moving inland from Wewak captured the Japanese strongholds on Mount Shiburangu and Mount Tazaki and pushed further south to Mount Shoto .
In early August, the Japanese had been pushed back into a small area south of the mountains. Some men had been sent south from Adachi to the Sepik Valley to find food. Adachi hoped to build one last defense that would last at least into September.
End of the fighting
The campaign dragged on until the end of the Pacific War. In 10 months the 6th Division advanced nearly 115 km along the coast and in the mountains. They drove the 18th Army (or their remnants) from 7,800 square kilometers of territory.
442 Australians were killed and 1,141 wounded. There were also downed RAAF aircraft and their crews.
The Japanese casualties during this campaign amounted to around 9,000 soldiers. 269 Japanese were captured and others died of starvation and serious illness.
Between 1942 and the capitulation in late August 1945 , the total strength of the 18th Army in New Guinea had fallen from 100,000 soldiers to around 13,500.
After the war, Adachi Hatazō was charged with war crimes , including the killing of prisoners, and sentenced to life imprisonment on July 12, 1947 . On September 10th of the same year, he killed himself in his quarters on the prison campus in Rabaul after first writing a series of letters.
in the history of both countries, the fighting of 1945 will endure as examples of great steadfastness. But whether they were still necessary for the war remains a matter of dispute.
Individual evidence
- ↑ a b c d e f g George James Odgers: Chapter 20, From Aitape to Wewak. (PDF) In: Second World War Official Histories - Volume II - Air War Against Japan, 1943–1945. Australian War Memorial, accessed July 22, 2020 (Download the PDF from the link provided).
- ↑ a b | The Australian War Memorial. In: Aitape-Wewak Campaign. Retrieved July 21, 2020 (English).
- ↑ a b c Gavin Long: Australia Army 7 Final Campaigns: Chapter 11: Taking Over at Aitape. Australian War Memorial, Canberra 1963, accessed July 21, 2020 .
- ↑ a b c Dr. John Moremon: Remembering the War in New Guinea - Aitape – Wewak 1944–45. Australian War Memorial, accessed July 21, 2020 .
- ↑ Gavin Long: Australia Army 7 Final Campaigns: Chapter 12: Across the Danmap. Australian War Memorial Canberra, 1963, accessed July 23, 2020 .
- ↑ a b c d e f Rickard, J: Battle of Wewak, December 1944-September 1945. In: HistoryOfWar.org. July 23, 2015, accessed on July 29, 2020 .
- ↑ Gavin Long: Australia Army 7 Final Campaigns: Chapter 13: To Dagua: and Across the Amuk River. Australian War Memorial, Canberra, 1963, accessed July 23, 2020 .
- ↑ a b c d e Gavin Long: Australia Army 7 Final Campaigns: Chapter 14: Maprik and Wewak Taken. Australian War Memorial, Canberra, 1963, accessed July 29, 2020 .
- ↑ Hata, Ikuhiko; Takahashi, Fumio: Dai 19-sho: Nihongun Zendai Mimon no Shūdan Tōkō . Hara Shobō, 1998, ISBN 978-4-562-03072-9 (Japanese).
- ↑ a b Gavin Long: Australia Army 7 Final Campaigns: Chapter 15: Tazaki and Shiburangu. Australian War Memorial, Canberra, 1963, accessed August 7, 2020 .
Web links
- Information on Pacific Wrecks :


