Zulu War
| date | January 11 to September 1, 1879 |
|---|---|
| place | Zululand |
| output | British victory |
| consequences | Annexation of Zululand |
| Parties to the conflict | |
|---|---|
| Commander | |
|
King Cetshwayo kaMpande |
|
| Troop strength | |
|
1st campaign: around 16,000 men, including around 7,000 whites. 2nd campaign: around 21,000 men, including over 15,000 whites |
35,000–50,000 warriors, the latter number representing the total number of men Zulu capable of fighting, assumed by the British |
| losses | |
|
1,727 killed |
at least 10,000 killed (estimate) |
Isandhlwana - Nyezane - Rorke's Drift - Ntombe - Hlobane - Kambula - Gingindlovu - Ulundi
The Zulu War of 1879 was an undeclared war between the Zulu people in South Africa and the British Empire . After the Zulu's initial successes in the Battle of Isandhlwana , the British were ultimately victorious in the Battle of Ulundi . With the defeat of the Zulu, Zululand lost its sovereignty.
prehistory
Rise of the Zulu
The Zulu are in today's South African province of KwaZulu-Natal -based Bantu -Volk. At the beginning of the 19th century, the Zulu under King Shaka established a powerful kingdom between the Tugela and Pongola rivers by subjugating their neighboring tribes and introducing a centralized military system . This was able to assert itself against Boer attacks during the " Great Trek ".
In 1852 the Zulu king Mpande granted Boer farmers settlement rights in the areas south of the Pongola and east of the Blood River . They then founded the Republic of Utrecht . While the Zulu continued to view the area as part of Zululand, the Boers viewed themselves as independent. This was never recognized by the Zulu and the settlers lived with constant fear of Zulu attacks. This conflict continued to smolder when the republic, which had since become part of the Boer South African Republic , came under British rule with the annexation of the latter by Great Britain .
British expansion
In 1876, under the British Colonial Minister Lord Carnarvon, the Constitution Act, 1867 , was passed, which granted the British colonies in Canada a constitution and a certain degree of independence from Great Britain. Carnarvon wanted to do a similar thing in South Africa. The Cape Colony received internal autonomy as early as 1872. To implement this plan, he sent Henry Bartle Frere to South Africa as High Commissioner . A major obstacle to the project was the existence of two independent neighboring states: the South African Republic and the Kingdom of Zululand. In addition, Zululand had a large and well-organized army under its king Cetshwayo and the British feared Zulu attacks on their colony Natal . After the annexation of Natal in 1843 and the South African Republic in 1877 by the British Empire, Zululand was now almost completely enclosed by British-controlled territory.
In 1878 Sir Henry Bulwer, the governor of Natal, set up a border commission to clarify the border issue between the annexed South African Republic (now called the Transvaal ) and Zululand ( disputed territory ). It ruled in favor of the Zulu on almost every point. Frere, who saw the result as "one-sided and unfair to the Boers" (said Boers had become British subjects through the annexation of the South African Republic), decreed that Boer settlements in the disputed area should be protected. Cetshwayo were accused of being stubborn and tolerating border violations in the Transvaal and Natal.
Frere saw the war with the Zulu as an indispensable step on the way to a confederation and was supported in this by Lord Carnarvon. However, his war plans were in jeopardy when Michael Hicks Beach replaced Carnarvon as colonial minister in 1878. Hicks Beach preferred a negotiated solution to the Zulu conflict - all the more so as the British Army was already heavily involved in the Second Anglo-Afghan War at this time (see also The Great Game ). The British Colonial Ministry saw Afghanistan - and thus indirectly British India - as a much more important arena than the African province. In addition, unlike Frere, Hicks-Beach recognized the results of the border commission. Although the Colonial Ministry was aware of the fact that the dispute with the Zulu would have to be resolved at some point, in 1878 it did not believe that this had to be done in a warlike manner. As you will see from my dispatch, we entirely deprecate the idea of entering on a Zulu war in order to settle the Zulu question , Hicks Beach wrote to Frere in December 1878.
War preparations
Meanwhile, Frere was determined to go to war. He benefited from the long communication channels with the motherland. Letters from the Cape to London took weeks if not months. The letter did not reach Frere until after the outbreak of war. This enabled Frere to leave the government in the dark as to what was going on and to advance preparations for his attack.
He was assisted by Lieutenant General Lord Chelmsford . He was military commander in chief from February 1878 and had successfully ended the Ninth Border War with the Xhosa in the same year . Chelmsford had already served in the Crimean War and India. But since he served most of the time as a staff officer , he had little experience as a field commander.
Frere now transferred all available troops to Natal. He explained this to the government as a defensive measure against possible Zulu attacks. On November 11th, Bulwer gave Chelmsford permission to recruit 7,000 Africans as soldiers. These troops , known as Natal Native Contingent , were raised and commanded by Anthony Durnford , who had already been a member of the Border Commission.
In late 1878, Frere demanded 550 head of cattle from Cetshwayo as reparation for a minor border incident in which two Zulu warriors kidnapped two girls from Natal. However, Cetshwayo only sent £ 50 in gold. When a surveyor from the colonial authorities and a white trader were briefly captured in Zululand - both were released after a few hours - Frere demanded further compensation payments. Cetshvayo rejected these demands.
On December 11, 1878, Frere gave the Zulu an ultimatum . Among other things, it called for the cessation of raids on British settlers, undisturbed missionary work , a British envoy in Zululand and the reorganization of the Zulu army, whose deployment should also depend on British approval. The date of the ultimatum was deliberately chosen so that its expiration coincided with the harvest time of the Zulu, as many warriors were still busy bringing in the grain. However, it had rained late that year and the grain was not yet ripe. The celebrations at the beginning of the harvest season had already started and so it happened that the Zulu regiments were already fully mobilized in the Zulu capital Ulundi when the invasion began.
The armies
British
The British army initially consisted of 11,300 Europeans (including non-combatants ) and 5,800 Africans. It was organized in five departments, which penetrated the Zulu area in three columns. In the course of the campaign, the army was restructured.
-
British Army (Lieutenant General Lord Chelmsford)
- I. Division - 4,750 men (Colonel Charles Pearson)
- Division II - 3,871 men (Lt. Col. Anthony Durnford )
- III. Division - 4,709 men (Col. Richard Glynn)
- Division IV - 1,656 men (Colonel Evelyn Wood )
- V Division - 2,278 men (Col. Hugh Rowlands)
The British divisions were divided into battalions of eight companies each . The company strengths fluctuated between 60 and 100 men due to sick leave. The infantry wore red jackets, blue trousers and bright pith helmets , which were often colored with tea or coffee. The standard infantry weapon of the British was the Martini-Henry rifle (caliber .45). The artillery was equipped with 7- and 9-pounder guns and a rocket battery. The fifth column also carried two Gatling cannons . At the beginning of the campaign, Chelmsford had no regular British cavalry. Voluntary settlers and militias from Natal were used for reconnaissance and outpost tasks.
African auxiliaries
The British African auxiliaries were recruited from among the Basotho and other ethnic groups who were traditionally hostile to the Zulu (see Mfecane ).
The Natal Native Contingent (NNC) was formed from them . The structure of the NNC was similar to that of the regular British Army. Each NNC regiment consisted of two or three battalions, divided into ten companies of 100 men each. There were also nine white NCOs and one white officer.
Like the Zulu, the NNC was armed with a shield and a spear ; only about one in ten of them was equipped with a rifle. The fear of the white population of Natal to equip black people with firearms also played a role here. Their only "uniform" consisted of a red headband. In the course of the campaign, this often led to their own troops mistaking them for Zulu and shooting them at them.
The NNC's cavalry were the Natal Native Horse (NNH). Mostly recruited from Amangwane warriors , the NNH consisted of five squadrons of 50 men each. The NNH were much better equipped than the African infantry. Each rider had a sand-colored uniform, a fully equipped horse and - in addition to the traditional spear - a carbine . The NNH were also led by white officers.
When the war broke out, the NNC commander, Anthony Durnford, initially planned to use the black soldiers as scouts for the advancing British. On the one hand, the external resemblance to the Zulu would confuse their scouts, on the other hand, the athletic blacks were much better adapted to the climatic conditions than the slow and heavily laden British soldiers. Lord Chelmsford refused, however, and assigned the NNC only menial jobs, as he had no confidence in its combat capabilities.
After the Battle of Isandhlwana , British commanders questioned the loyalty of the local troops and the NNC was only used to guard the Natal border. After the war the NNC was dissolved.
The Natal Native Horse was an exception. The approximately 200 NNH soldiers who had survived the battle of Isandhlwana participated in the war until its end. After the war, the NNH were used as a police force in occupied Zululand. They were only dissolved during the Second Boer War .
Zulu
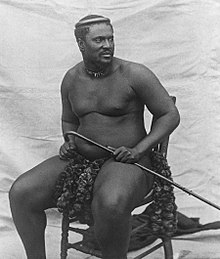
The Zulu army was around 40,000 strong. It was divided into regiments of around 1,500 men ( amabutho ; singular : ibutho ), which in turn were combined into corps . But there were also amabutho that were up to 4,000 strong. Every independent group of warriors, regardless of their size, was called impi .
- Zulu Army ( Ntshingwayo kaMahole Khoza )
- UNDI Corps (Prince Dabulamanzi KaMpande)
- independent ambabutho
- uNodwengu Corps
The Zulu fought in a tactic introduced by King Shaka called "buffalo horn" ( i'mpondo zankhomo ):
The impi were divided into three groups:
- the "horns" ( Izimpondo ), which surrounded and held the enemy. They were usually formed by younger and inexperienced warriors.
- the "chest" ( Isifuba ) formed the most powerful unit and attacked the enemy head-on.
- the "loins" formed the reserve and were used to pursue the defeated enemy. They mostly consisted of veterans .
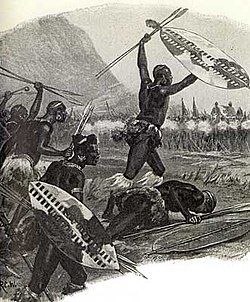
Zulu warriors were armed with a large cowhide shield ( isihlangu ). Its color provided information about the regimental affiliation. The Zulu warriors were armed with large war spears ( isijula , " Assegai "). At the beginning of the campaign only a few Zulu warriors were armed with rifles. They were mostly older percussion rifles or muskets . The weapons were mostly in poor condition, as there was no way to maintain the weapons in Zululand. King Cetshwayo, who recognized the importance of firearms for the war, had ordered in November 1878 that the Zulu shooters should train their accuracy. Later, captured modern British rifles were also used.
Through their numerical strength, their morale, their leadership and their agility, the Zulu were able to partially compensate for their technical inferiority.
The 1st Campaign (January to March 1879)
The plan of attack
After the ultimatum, which was unacceptable to the Zulu, had expired, British troops under Lord Chelmsford invaded Zululand from Natal on January 11, 1879. Chelmsford's original plan was to enter Zululand with five columns. Due to transport problems and the need to protect Natal and Transvaal from Zulu attacks, it was modified in December 1878 to only attack with three columns.
The I. Division under Pearson was to cross the Tugela at the Lower Drift and then march first along the coast to Eshowe, 30 km north.
The IV. Division under the later Field Marshal Evelyn Wood marched southeast from Utrecht to cross the border at Kambula.
The strongest III. Division, nominally commanded by Colonel Glynn but actually commanded by Chelmsford himself, advanced northeast from Helpmekaar via Rorke's Drift .
Durnford's II. Division was intended to support the I., while the V. Division under Rowlands remained in a defensive position on the Pongola . It was supposed to protect the Transvaal from rebellious Pedi, to keep an eye on the discontented Boers and to secure the open left flank of the 4th Division. Lieutenant Colonel Redvers Buller , who later became Commander-in-Chief of the British in the Second Boer War , with his approx. 200 cavalry men was initially assigned to the V Department. Dissatisfied with their inaction, he left them on his own and joined Woods IV Division.
Initially, Chelmsford wanted to secure the border area north of the Tugela to prevent Zulu raids on Natal. For this purpose, Durnford's II. Division was instructed to cross the Tugela at Rorke's Drift and join Glyns III. Department to join. All three attack columns were then to march on Cetshwayo's capital Ulundi .
Isandhlwana and Rorke's Drift
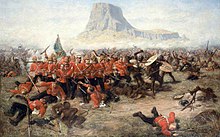
Already on January 12, 1879, not far from the Tugela ford near Rorke's Drift, two clashes between reconnaissance troops of III. Division and 200–300 Zulu guarding an abandoned kraal . These battles and the aggressive advance of the III. Department led Cetshwayo to focus on this department. The main Zulu force therefore marched on January 17th from oNdini towards Chelmsford. On January 22nd, 1879 a part of the III. Division in the Battle of Isandhlwana a catastrophic defeat. Lord Chelmsford had completely misjudged the strength of the opposing forces before the battle. The 1,800 soldiers left behind faced a Zulu force more than ten times as strong under Ntshingwayo Khoza. When the battle broke out around noon on January 22nd, Chelmsford and most of his troops were too far away to intervene. He incorrectly interpreted the noise of the battle as target practice. The regular British troops were able to repel the onslaught of the Zulu for a while with their aimed fire, while the auxiliary troops without rifles quickly fled. The British, who also ran out of ammunition, then withdrew in the direction of the camp, but were partly outflanked, partly overtaken by the Zulu and cut down in a scuffle between spear and bayonet . Over 1,300 British and Associate soldiers were killed. Around 1,000 Zulu warriors are believed to have paid for the attack with their lives, and up to 2,000 more are likely to have been wounded. On his return that evening Chelmsford found a field of bodies.

On 22./23. On January 1st - 15 km from Isandhlwana - at Rorke's Drift , a mission station and ford over the Tugela, 139 British were able to withstand the attack by about 4,000 Zulu of the uNdi corps under Prince Dabulamanzi kaMpande. The uNdi corps had formed the reserve of the Zulu army near Isandhlwana and was not deployed there. The British were led by Lieutenant Chard and Bromhead . When Chelmsford and the rest of his troops approached on the morning of January 23, the Zulu, who had also suffered heavy losses, withdrew after ten hours of fighting. British casualties were 17 dead and 10 wounded. The Zulu had lost up to 1,000 dead and injured. 11 soldiers were awarded the Victoria Cross for Rorke's Drift . This is the largest number of Victoria Crosses ever awarded for a battle.
The news of the defeat at Isandhlwana spread very quickly among the white settlers. They formed defensive camps or went to safer places like Pietermaritzburg or Durban . The British feared an invasion of Natal. But the Zulu army, which had lost up to 4,000 men dead and wounded in two days, was too weak to take advantage of its victory.
The invasion came to a standstill
After the Isandhlwana disaster, Glynn's column was in fact no longer operational. In order to secure Natal against attacks by the Zulu, she set up a fortified position at Rorke's Drift and stayed there for the time being. Chelmsford gave orders to Woods and Pearson's columns to proceed as they saw fit, but not to put themselves in danger.
Woods IV Division had already invaded Zululand from the northwest. With the withdrawal of the III. Division now had no cover on his right flank. Wood therefore decided to stay where he was and set up fortified positions near Kambula, not far from the border with the Transvaal.
The I. Division under Pearson was attacked on their way to Eshowe on January 22nd on the Nyezane River by a 6,000-strong Zulu army. Pearson was able to repel the attack after 1.5 hours of fighting and lost 10 soldiers, and there were 16 wounded on the British side. The next day he reached Eshowe and fortified the mission station. Chelmsford left it up to him to retire on the Tugela or hold Eshowe, since a further advance on Ulundi was out of the question. Pearson opted for the latter and was trapped there by the Zulu. The siege of Eshowe was to last until April 3rd.
Political Consequences
The defeat of Isandhlwana sparked public interest in the Zulu War. In Great Britain there was a war euphoria ( jingoism ), which demanded revenge for the shame suffered.
The government's attitude towards the war, however, was mixed. On the one hand, the government had been opposed to the war from the start and was now faced with a fait accompli by Frere and Chelmsford. Hicks Beach Frere continued to forbid the annexation of Zululand and again called on them to reach a negotiated peace. Cetshwayo had already made an offer to negotiate, but Frere and Chelmsford ignored it. In turn, the two of them benefited from the long communication routes to their motherland. Within the military, particularly among the Horse Guards , criticism of Chelmsford's leadership grew and he was increasingly blamed for the defeat of Isandhlwana. In addition, the inflationary award of the Victoria Cross was criticized, which was assumed to conceal the military mishaps. For comparison: 23 Victoria Crosses were awarded in the Zulu War, only one each in the Battle of Britain and on D-Day .
On the other hand, the British Empire had to defend its reputation. Anything but a clear victory over the Zulu would have been a signal to the colonies that the Empire was not invulnerable and that a victory over the British army could have an impact on colonial policy as a whole. Previously, the unjustified costs were an important reason for rejecting the war, but now the conviction has prevailed that the expenditures for subjugating the Zulu would be amortized in the long term, as this would prevent further uprisings. In fact, the British government sent in more reinforcements than Chelmsford had previously requested.
Hlobane and Kambula
Chelmsford meanwhile planned to lift the siege of Eshowe. As early as March 17th, he asked Wood, if possible, to start an offensive. It should be timed so that news of the British attack reached the Zulu at Eshowe around March 29. The aim was to direct the main Zulu army on Wood, thus relieving the pressure on Eshowe on the liberation expedition. Wood then planned an attack on the 1,000 to 4,000 abaQulusi-Zulu mountain plateau of Hlobane for March 28th . Cetshwayo, sobered by the failure of his negotiating efforts, mobilized his main army in Ulundi on March 22nd. Nominally, the 20,000 men were commanded by Cetshwayo's Prime Minister Chief Mnyamana, but tactical control was still held by Ntshingwayo Khoza. The army left Ulundi on March 24th and joined forces with the Zulu at Hlobane on March 28th, much to the disadvantage of the British. On the same day there was a battle between Wood's cavalry under Buller and Lt. Colonel Cecil Russel, around 1,300 men in all, and the main Zulu army. In this battle of Hlobane , the Zulu were victorious. The British, surprised by the arrival of the main Zulu army and hampered by rocky terrain, lost almost a quarter of their deployed troops. The next day, the Zulu army attacked Woods fortified position near Kambula. However, through the battle at Hlobane Woods was already aware of the strength of the Zulu and had also gained an extra day to reinforce his fortifications.
On March 29, 25,000 Zulus, including many warriors who had fought at Isandhlwana, faced 2,000 British at the Battle of Kambula . The battle began in the early afternoon and ended in a British victory. The Zulu attacked in several unsuccessful waves until around 5:00 p.m. Then Wood began the counterattack. The defeat at Kambula marked a turning point in the Zulu War. The morale of the victors of Isandhlwana was significantly weakened and that of the British restored. In addition, many regiments disbanded after the battle and the warriors returned to their villages. Only a small part of the army returned to Ulundi with Mnyamana.
Chelmsford's liberation expedition, which also set out from the Lower Drift on March 29, defeated a Zulu contingent at KwaGingindlovu on April 2 . The Zulu lost around 1,000 men, the British only lost 13 dead and 48 wounded. The next day Chelmsford was able to relieve Eshowe's trapped troops .
Chelmsford's replacement
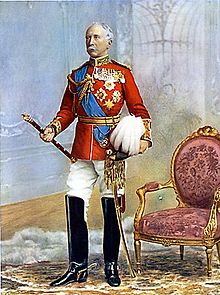
As a consequence of the defeat of Isandhlwana and the growing criticism of the military against Chelmsford, he was replaced on May 22nd by Lieutenant General Garnet Joseph Wolseley as Commander in Chief in South Africa. Wolseley had successfully fought already in the previous colonial wars and was at that time High Commissioner of the just from the Ottoman Empire acquired Cyprus . He had also been Governor of Natal in 1875. Hicks-Beach gave him full authority for his new command to negotiate a satisfactory peace . This did not necessarily imply a military victory. Wolesley's only stipulations were time - as soon as possible - and the ban on annexing Zululand. Frere's plan for a confederation would have become obsolete. Wolesley left the UK on May 30, but it would be three weeks before he reached South Africa.
The 2nd Campaign (May to July 1879)
Reinforcements from across the Empire had arrived in South Africa by early summer and Lord Chelmsford began to restructure his forces. He reverted to his original tactic of invading Zululand several departments at the same time. This time, however, the attack should be carried out with significantly stronger columns.
- British Army (Lieutenant General Lord Chelmsford)
- 1st Division (Maj. Gen. Henry Hope Crealock)
- 1st Brigade (Col. Pearson)
- 2nd Brigade (Colonel Clarke)
- 2nd Division (Major General Edward Newdigate)
- 1st Brigade (Col. Collingwood)
- 2nd Brigade (Colonel Glyn)
- Cavalry Brigade (Major General Marshall)
- Flying Corps (Brigadier General Wood )
- 1st Division (Maj. Gen. Henry Hope Crealock)
The 1st Division under Crealock advanced along the coast. She was to support the 2nd Division and Woods Flying Corps , which marched under Newdigate from Rorke's Drift and Kambula on Ulundi . As a reward for his good work, Wood kept his independent command.
Chelmsford had learned of his replacement by Wolseley on June 17th and saw the only way to save his military reputation and career was to present a fait accompli to the government in London . He therefore tried to end the campaign with a decisive battle before his successor arrived. On April 17th he moved his headquarters from Durban to Pietermaritzburg , and on May 8th to Utrecht .
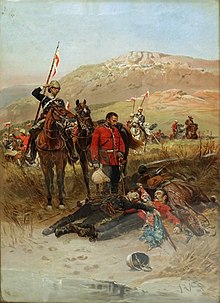
The beginning of the British offensive was overshadowed by the death of Prince Napoléon Eugène Louis Bonaparte , who fell while exploring on June 1st. Notwithstanding this, the British continued their offensive towards the Zulu capital, Ulundi, which they reached in late June. Meanwhile, the British sent couriers with a peace offer to Cetshwayo , which was just as unacceptable to the Zulu king as the first ultimatum. Cetshwayo also asked for negotiations, which the British ignored.
When Wolesley finally reached Crealock's headquarters, the 2nd Division and Wood Corps, 5,317 men supported by artillery and Gatling machine guns, were already in front of Ulundi. On July 4, they faced 12,000-20,000 Zulu in the Battle of Ulundi . As in the battles of Kambula and KwaGingindlovu, the British had adjusted to the combat tactics of the Zulu army. The British troops formed a square of two rows of infantry within which the cavalry and local auxiliaries waited. The square was now moving towards Ulundi, awaiting the Zulu attack, which came at 9:00 a.m. After the infantry had brought the attack wave of the Zulu to a standstill with concentrated rifle fire, the cavalry attacked from the square and broke up the formations of the already demoralized Zulu. The battle ended after two hours with a decisive victory for the British, who had only 12 dead and 70 wounded. The losses of the Zulu, however, amounted to around 1,500 men. Ulundi, which had been evacuated by the Zulu before the battle, was burned down.
The end of the war
On July 17th, Wolesley took command of Chelmsford. Chelmsford, Buller and Wood then returned to Great Britain. Cetshwayo, who himself did not take part in the Battle of Ulundi, had fled north and the Zulu army had disbanded.
Wolesley found it absolutely necessary for the future security of Natal to divide Zululand into self-governing districts. He had initially left open how many districts and who should rule them. The only thing that was certain was that the largest and most important of these would be along the northern border of Natal and be ruled by John Dunn. Dunn, a settler and hunter from the Cape Province , had lived in Zululand for a long time and was fluent in Zulu. He had been an adviser to Cetshwayo before the war and served as a scout for the British during the war.
Expecting no more military resistance, Wolesley began to break up Chelmsford's great army by sending some regiments home. I shall thus, he wrote, get rid of useless generals and reduce expenditure. He wanted to break the remaining resistance in Zululand with small, mobile columns and with the help of friendly Zulu and Swazi .
On August 17th, the chiefs of the coastal region submitted to the British; most of the chiefs of the north followed them at the end of August. Wolesley allowed them "independent and sovereign" power over their districts. The chiefs were delighted.
On August 28, Cetshwayo was captured by a British patrol and taken to Cape Town, where he remained in captivity until 1881. The remaining resistance of the Zulu then collapsed. On September 1, Wolesley announced the details of the division of Zululand: Zululand was divided into 13 independent districts or kingdoms ( chiefdoms ) under a British resident. The largest and strategically most important district was given to Dunn. The previously disputed territories fell to the Transvaal.
aftermath
Wolesley's decisions were based on strategic considerations: in order to secure the neighboring British territories and prevent the resurgence of the Zulu kingship, border and coastal districts were assigned to chiefs who had either supported the British in the war, showed themselves to be autonomous towards Cetshwayo's kingship, or presented themselves early yielded enough to win the trust of the British (and the distrust of the Zulu). This was very much like the practice in British India , where British-friendly native rulers of border areas were monitored by British residents.
After 1879, however, there were repeated civil war-like conflicts between the individual chiefdoms , and the chiefs increasingly consulted the Boers of the Transvaal to resolve them. In 1884, Cetshwayo's son Dinuzulu ceded more than a million hectares of land to the Boers for their help in putting down one of these uprisings. The British government, concerned about the expansion of the Boers to the sea, officially recognized the South African Republic (CAR) in 1886 on the condition that it withdrew from the Zulu area. At that time, Zululand had already lost two thirds of its territory to the Transvaal.
In December 1897, Zululand was finally annexed by Natal. The Native Administration of Natal was now expanded to include the Zulu, with two-fifths of the land being divided up among white settlers; Zulu "reserves" were set up in the remaining three fifths.
The Zulu War is still having an impact today. Mangosuthu Buthelezi , interior minister of the first post-apartheid government in South Africa and chairman of the Inkatha Freedom Party , is convinced that Zululand could have developed into a sovereign state like Lesotho or Swaziland without British aggression . The Zulu kingdom in the province of KwaZulu-Natal is enshrined in the constitution of the Republic of South Africa.
The Zulu War in the movie
- The events during the fighting for Rorke's Drift were filmed in the 1964 film Zulu with Michael Caine .
- In The Last Offensive ( Zulu Dawn ) from 1979 with Peter O'Toole and Burt Lancaster , the events of the Battle of Isandhlwana are shown.
- A scene from the 1983 film The Meaning of Life by British comedian group Monty Python is set in the Zulu War.
Timetable
- December 1878.
- December 11th Delivery of the British ultimatum
- January 1879.
- January 11th, British invasion of Zululand
- January 22nd Battle of Isandhlwana
- January 22nd Battle of the Nyezane River
- 22./23. January Battle of Rorke's Drift
- March 1879.
- March 12th Battle of the Ntombe River
- March 28th Battle of Hlobane
- March 29th Battle of Kambula
- April 1879.
- April 2nd Battle of Gingindlovu
- June 1879.
- June 1, death of Prince Napoléon Eugène Louis Bonaparte
- July 1879.
- July 4th Battle of Ulundi
- August 1879.
- August 28th King Cetshwayo is captured
literature
- Frances E. Colenso: History of the Zulu War and its Origin. Assisted in those Portions of the Work which touch upon military Matters by Lieut.-Colonel Edward Durnford. Chapman & Hall, London 1880. (PDF file; 35.3 MB)
- Saul David : Zulu. The Heroism and Tragedy of the Zulu War of 1879. (= Penguin History). Penguin, London 2005, ISBN 0-14-101569-1 .
- Donald Featherstone: Victorian Colonial Warfare. Africa. From the campaigns against the Kaffirs to the South African War. Cassell, London 1992, ISBN 0-304-34174-6 .
- Philip J. Haythornthwaite: The Colonial Wars Source Book. (= Source Books). Caxton Editions, London 2000, ISBN 1-85409-436-X .
- Ian Knight : National Army Museum Book Of The Zulu War. (= Pan Grand Strategy Series). Pan MacMillan, London 2004, ISBN 0-330-48629-2 .
- Ian Knight: Zulu. Isandlwana and Rorke's Drift 22nd – 23rd January 1879. Windrow & Greene, London 1992, ISBN 1-872004-23-7 .
- Ian Knight: Zulu War. Osprey Publishing, Oxford 2004, ISBN 1-84176-858-8 .
- John Laband : Historical Dictionary of the Zulu Wars (= Historical Dictionaries of War, Revolution, and Civil Unrest). Scarecrow Press, Inc., 2009, ISBN 978-0-8108-6078-0 .
- John Laband: Kingdom in Crisis. The Zulu Response to the British Invasion of 1879. Pen & Sword Books, 2007, ISBN 978-1-84415-584-2 .
- John Laband: The A to Z of the Zulu Wars (= The A to Z Guide Series. No. 202). The Scarecrow Press, Lanham / Toronto / Plymouth 2010, ISBN 978-0-8108-7631-6 .
- John Laband, Paul Thompson: Kingdom and Colony at War (= The Anglo-Zulu War Series). University of Kwazulu Natal Press, 2001, ISBN 0-86980-765-X .
- Ron Lock, Peter Quantrill: Zulu Vanquished. The Destruction Of The Zulu Kingdom. Greenhill Books, London et al. 2005, ISBN 1-85367-660-8 .
- Leigh Maxwell: The Ashanti ring. Sir Garnet Wolseley's Campaigns 1870–1882. Leo Cooper et al., London 1985, ISBN 0-436-27447-7 .
- Charles L. Norris-Newman: In Zululand with the British Army. The Anglo-Zulu War of 1879 through the First-Hand Experiences of a Special Correspondent (= Eyewitness to War Series), Leonaur Ltd., 2006, ISBN 1-84677-121-8 .
- The Illustrated London News. 1879, ISSN 0019-2422 .
Web links
- History of the Anglo-Zulu War by Ian Knight (English)
- Anglo-Zulu War Historical Society (English)
- Rorke's Drift (English)
- Military History Journal - Vol 4 No 4: The Anglo-Zulu War of 1879. Isandlwana and Rorke's Drift ( Memento of April 7, 2006 in the Internet Archive ) (English)
Footnotes
- ↑ See Norris-Newman (2006), pp. 19-25 and 187-191. - Sick persons, other disabled persons and non-combatants accompanying the army or serving in the army have already been deducted from these figures.
- ↑ See Norris-Newman (2006), pp. 25–31.
- ↑ See Lord Chelmsford's Official Account of the Battle of Ulundi , dated July 6, 1879; printed in Appendix C by Norris-Newman (2006), pp. 307-313, here p. 312: " The loss of the Zulus killed in action since the commencement of hostilities in January, has been placed at not less than 10,000 men, and I am inclined to believe this estimate is not too great. "
- ↑ Ian Knight (2004), p. 146. - Different figures can be found in Norris-Newman (2006), p. 21.
- ^ Ian Knight (2004), p. 152.
- ↑ Ian Knight (1992), p. 67.
